You found GootLoader in your WordPress database. Now what?
If you ran the detection queries from our previous article and confirmed malicious posts, you’re facing a decision: delete everything immediately or take a more careful approach.
We recommend the careful approach. Here’s why, and how to do it right.
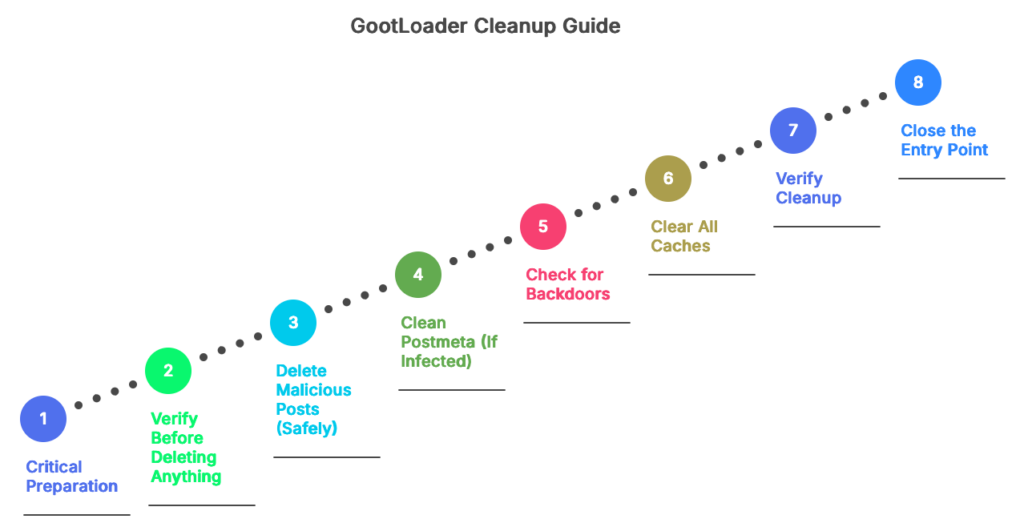
Before You Start: Critical Preparation
1. Backup Everything
This is non-negotiable. Before touching your database:
# Via WP-CLI
wp db export gootloader-backup-$(date +%Y%m%d-%H%M%S).sql

# Or via phpMyAdmin: Export > Quick > SQL > Go
Store this backup somewhere safe. Not just on your server—download it to your local machine.
2. Document What You Found
Screenshot or copy the SQL query results showing malicious posts. You’ll want this for:
- Incident reports to stakeholders
- Forensic analysis if you need to understand how they got in
- Comparison after cleanup to verify everything’s gone
3. Take Your Site Offline (Optional but Recommended)
If search engines are already indexing the malicious pages, taking your site offline briefly won’t make things worse. It will prevent new victims from downloading malware while you clean.
Use a maintenance mode plugin or add to wp-config.php:
define('WP_MAINTENANCE_MODE', true);Step 1: Verify Before Deleting Anything
Never trust a query result without manual verification. Open each flagged post in the WordPress editor and confirm it’s actually malicious.
Red flags that confirm it’s malicious:
- You didn’t create it
- Title is generic (“Agreement Template”, “Contract Form”)
- Content contains obfuscated JavaScript
- Post date coincides with when symptoms started
- Contains references to WOFF2 fonts you didn’t add
- Hidden elements containing external scripts
Legitimate content that might get flagged:
- Your own legal documents or contract templates
- Accessibility features using
visibility:hiddenwithout external links - Legitimate embedded content (YouTube, Vimeo) that happens to use custom fonts
When in doubt, check post revisions. Go to the post editor and click “Revisions” in the right sidebar. If the malicious content appeared suddenly in one revision, that’s confirmation.
Step 2: Delete Malicious Posts (Safely)
Don’t run DELETE FROM wp_posts directly. Use WordPress’s built-in deletion to trigger all necessary cleanup hooks.
Option A: Via WordPress Admin (Safest)
- Go to Posts > All Posts
- Filter by the characteristics you found (post date range, search for “agreement” in title)
- Select malicious posts using checkboxes
- Bulk Actions > Move to Trash
- Go to Trash
- Verify the posts in Trash are actually malicious
- Permanently delete
This method ensures WordPress cleans up:
- Associated postmeta
- Revisions
- Comments
- Cache entries
Option B: Via WP-CLI (Faster for Many Posts)
# Delete specific posts by ID
wp post delete 12345 --force

# Or delete multiple at once
wp post delete 12345 12346 12347 --force

# Delete all posts matching a pattern (DANGEROUS - verify first!)
wp post list --post_type=post --s="agreement" --format=ids | xargs wp post delete --force
Note: The --force flag skips the trash and permanently deletes. Remove it if you want to trash first for extra safety.
Step 3: Clean Postmeta (If Infected)
If Query 4 from the detection article found malicious postmeta entries, you need to clean those too.
Critical: Postmeta deletion is more dangerous than post deletion because you might accidentally remove legitimate custom fields.
Verify the Meta Key
SELECT post_id, meta_key, LEFT(meta_value, 200) AS preview
FROM wp_postmeta
WHERE meta_id = 67890;  -- Use the meta_id from your detection results
Look at the meta_key. If it’s something like:
_elementor_databut you don’t use Elementor → Suspiciouscustom_script_injection→ Obviously malicious_thumbnail_id→ Legitimate, DO NOT DELETE
Delete Confirmed Malicious Meta
-- Delete specific meta entries by ID
DELETE FROM wp_postmeta WHERE meta_id IN (67890, 67891, 67892);

-- Or via WP-CLI
wp post meta delete POST_ID META_KEY
Step 4: Check for Backdoors
GootLoader often creates persistence mechanisms. Check these locations:
Scheduled Tasks
# Via WP-CLI
wp cron event list

# Look for suspicious scheduled events with names you don't recognize
# Delete them:
wp cron event delete HOOK_NAME
User Accounts
# Via WP-CLI - list all administrator accounts
wp user list --role=administrator

# Look for users you didn't create
# If found, delete:
wp user delete USER_ID --reassign=ADMIN_ID
Plugin/Theme Files
Even though GootLoader hides in the database, some variants install backdoor plugins. Check:
# List all plugins
wp plugin list

# Look for plugins you didn't install
# Deactivate and delete:
wp plugin deactivate malicious-plugin
wp plugin delete malicious-plugin
Step 5: Clear All Caches
Critical step that’s often forgotten. Cached versions of infected pages can still appear to visitors.
# Via WP-CLI
wp cache flush

# If using W3 Total Cache
wp w3-total-cache flush all

# If using WP Rocket
wp rocket clean --confirm

# Or manually in WordPress Admin:
# - W3 Total Cache: Performance > Clear All Caches
# - WP Rocket: Settings > Clear Cache
# - LiteSpeed Cache: LiteSpeed Cache > Toolbox > Purge All
Also clear:
- CDN cache (Cloudflare, etc.)
- Object cache (Redis, Memcached)
- Opcode cache:
wp cli cache clear
Step 6: Verify Cleanup
Run the detection queries again:
-- Re-run all 4 detection queries from the previous article
-- You should get 0 results now
Also check:
- Google Search Console: Request re-indexing of your site
- Browse your site in incognito mode to see what visitors see
- Check your sitemap to ensure no malicious URLs remain
Step 7: Close the Entry Point
You’ve cleaned the infection. Now prevent re-infection.
Common GootLoader entry points:
- Outdated WordPress core, themes, or plugins
- Weak admin passwords
- Exposed wp-login.php without rate limiting
- File upload vulnerabilities in plugins
- Compromised FTP/SSH credentials
Hardening steps:
- Update everything:
wp core update
wp plugin update --all
wp theme update --all- Strong passwords:
wp user update USERNAME --user_pass="$(openssl rand -base64 24)"- Limit login attempts (install plugin like Limit Login Attempts Reloaded)
- File permissions:
find /path/to/wordpress -type f -exec chmod 644 {} \;
find /path/to/wordpress -type d -exec chmod 755 {} \;
chmod 600 wp-config.php- Disable file editing: Add to
wp-config.php:
define('DISALLOW_FILE_EDIT', true);When Manual Cleanup Gets Complicated
The process above works if you have:
- 1-5 clearly malicious posts
- Basic postmeta infections
- Time to manually verify each post
It doesn’t work well if you have:
- 50+ infected posts across multiple sites
- Infections in Elementor JSON data (requires parsing nested structures)
- Mixed legitimate and malicious content in the same post
- Need for audit trail showing what was removed and when
This is where Content Guard Pro handles the complexity:
Quarantine Instead of Delete
We neutralize content on render without touching the database. You can verify each finding is actually malicious before permanent deletion. No “oops, I deleted the wrong post” panic.
Bulk Operations with Confidence Scores
Sort findings by confidence score. Bulk-quarantine everything above 85 confidence. Manually review everything below. Process 100 findings in 10 minutes instead of 3 hours.
Audit Trail
Every action is logged: what was quarantined, when, by whom. If stakeholders ask “did you clean the GootLoader infection?”, you have proof.
One-Click Rollback
We leverage WordPress Revisions. If quarantine broke something, one-click rollback to the last known good version.
After Cleanup: Monitoring
Set up monitoring so you catch re-infections early:
- Google Search Console alerts for security issues
- Scheduled scans (Content Guard Pro does this automatically)
- File integrity monitoring for unexpected wp_posts growth
- Analytics alerts for traffic spikes to unusual URLs
The Bottom Line
Manual GootLoader cleanup is doable for small infections if you’re comfortable with SQL and WordPress internals. For anything beyond a handful of posts, or if you’re managing multiple sites, automated tools save hours of tedious verification.
Either way, the key is: backup first, verify before deleting, clean thoroughly, close the entry point, and monitor for re-infection.